


Categories


Latest Products


DFRduino UNO R3 - Compatible with Arduino Uno
- Product SKU: DF_DFR0216
- Category: Arduino, Development Platform

- Order within
DFRduino Uno V3.0 from DFRobot is a physical world computing board of small size for academics or development . It is a simple microcontroller board fully compatible with Arduino UNO R3 and Arduino IDE open-source development environment. This environment implements the Processing / Wiring language. Arduino can be used to develop stand-alone interactive objects or can be connected to software on your computer (e.g. Flash, Processing, MaxMSP). The open-source IDE can be downloaded for free (currently for Mac OS X, Windows, and Linux).
This board features the ATmega16U2 programmed as a USB-to-serial converter. An added bonus is that our DFRduino is still using the DIP package AVR Chip. You could remove it to update or reprogram the chip's firmware, or even to place it on a finished, more compact project. The cool thing about our new DFRduino microcontroller is that the headers use different colors to feature I/O ports of different types:
Red for Power Section.
Blue for Analog I/O.
Green for Digital I/O.
These colors match our sensor cables. This makes it really easy to figure out where to connect sensors, or to identify which side is Analog (blue) or Digital (green).
"Arduino Uno" is a microcontroller board based on the ATmega328. It has 14 digital input/output pins (of which 6 can be used as PWM outputs), 6 analog inputs, a 16 MHz crystal oscillator, a USB connection, a power jack, an ICSP header, and a reset button. It contains everything needed to support the microcontroller; simply connect it to a computer with a USB cable or power it with a AC-to-DC adapter or battery to get started.
This board added SDA and SCL pins that are near to the AREF pin and two other new pins placed near to the RESET pin, the IOREF that allow the shields to adapt to the voltage provided from the board. In future, shields will be compatible both with the board that use the AVR, which operate with 5V and with the "Arduino Due" that operate with 3.3V. The second one is a not connected pin, that is reserved for future purposes.
DFRduino UNO R3 Related Projects:
Spectrophotometer Experiment Based on AS7341 Spectral Sensor
DIY Temperature Gun Using Arduino and MLX90614 Module
How To a Make Bluetooth Tank for Arduino with Custom Android Application (V1.0)?
Arduino Project - Make an Arduino Intervalometer For Timelapse Photography
Existential Crisis aka Arduino RPG
How to Make A Terrifying Halloween Gadget?
How to Build a Robot ¨C Lesson 1: Introduction
How to Build a Robot Lesson 2: Build a Basic Robot with Arduino
How to Build a Robot Lesson 3: Build a Line Tracking Robot with Arduino
How to Build a Robot Lesson 4: Build a Robot That Could Avoid Obstacles with Arduino
How to Build a Robot Lesson 5: Build a Robot With Light And Sound Effects with Arduino
How to Build a Robot Lesson 6: Build a Robot That Could Monitor Environment with Arduino
How to Build a Robot Lesson 7: Build a Bluetooth-Controlled Robot with Arduino
ESP8266 Arduino Programming Tutorial
How to DIY an Indoor Carbon Dioxide Detector?
How to Build A Smart Cooling Fan with Arduino
DFRduino UNO R3 Project 1: How to Make A Terrifying Halloween Gadget
This is a simple but fun application for Halloween. All you need is a mask, a stepper motor, a micro-controller, a motor driver, a MP3 module and some wires as well as batteries.
Hardware components:
DFRduino UNO R3 - Arduino Compatible
TMC260 Stepper Motor Driver Shield For Arduino
Bipolar Stepper Motor with Planet Gear Box (18kg.cm)
DFPlayer - A Mini MP3 Player For Arduino
Gravity: Digital PIR (Motion) Sensor For Arduino
DFRduino UNO R3 Project 2. Test DFPlayer Mini MP3 Module by Stonez
This tutorial here is just to show you how to connect DFPlayer module with Arduino and speaker and the Arduino sketch provided here just to play few sample sounds I collected from Internet.
Hardware list:
DFPlayer Mini module
Speaker - DFPlayer module support to to 3W
SD card - 2GB ~ 32GB formatted with FAT or FAT32
MP3 / WAV - audio files
Arduino Uno Rev 3
Few jump wires
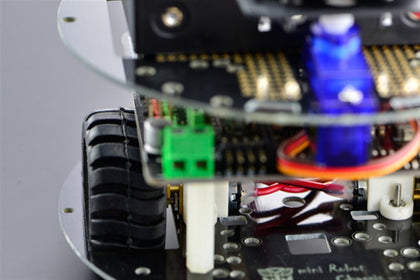
DFRduino UNO R3 Project 3. How to make a Smart Rock-Paper-Scissors Game Robot
When finishing reading this tutorial, you will find those very simple devices, principles and technologies can help you build very interesting equipment.
Hardware list:
DFRduino Uno R3 x 1
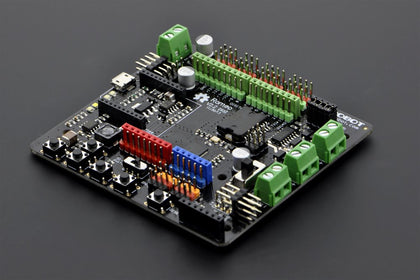
Gravity IO expansion shield for Arduino x 1
Tower Pro MG90S servo x 3
Ultrasonic wave sensor x 1
DFRduino UNO R3 Project 4 Arduino Projects: Zelda Song Player
Things you may need in this project: Hardware components
DFRobot DFRduino Uno R3
DFRobot Input Shield for Arduino
DFRobot Gravity: Digital Speaker Module
Arduino UNO & Genuino UNO
DFRduino UNO R3 Project 5 How To Make LED Kitchen Sink Lights with a PIR Sensor, Arduino, and 3D Printing
Specification
These colors match our sensor cables. This makes it really easy to figure out where to connect sensors, or to identify which side is Analog (blue) or Digital (green).
"Arduino Uno" is a microcontroller board based on the ATmega328. It has 14 digital input/output pins (of which 6 can be used as PWM outputs), 6 analog inputs, a 16 MHz crystal oscillator, a USB connection, a power jack, an ICSP header, and a reset button. It contains everything needed to support the microcontroller; simply connect it to a computer with a USB cable or power it with a AC-to-DC adapter or battery to get started.
This board added SDA and SCL pins that are near to the AREF pin and two other new pins placed near to the RESET pin, the IOREF that allow the shields to adapt to the voltage provided from the board. In future, shields will be compatible both with the board that use the AVR, which operate with 5V and with the "Arduino Due" that operate with 3.3V. The second one is a not connected pin, that is reserved for future purposes.Shipping List
This is a simple but fun application for Halloween. All you need is a mask, a stepper motor, a micro-controller, a motor driver, a MP3 module and some wires as well as batteries.
Hardware components:
DFRduino UNO R3 - Arduino Compatible
TMC260 Stepper Motor Driver Shield For Arduino
Bipolar Stepper Motor with Planet Gear Box (18kg.cm)
DFPlayer - A Mini MP3 Player For Arduino
Gravity: Digital PIR (Motion) Sensor For Arduino
DFRduino UNO R3 Project 2. Test DFPlayer Mini MP3 Module by Stonez
This tutorial here is just to show you how to connect DFPlayer module with Arduino and speaker and the Arduino sketch provided here just to play few sample sounds I collected from Internet.
Hardware list:
DFPlayer Mini module
Speaker - DFPlayer module support to to 3W
SD card - 2GB ~ 32GB formatted with FAT or FAT32
MP3 / WAV - audio files
Arduino Uno Rev 3
Few jump wires
DFRduino UNO R3 Project 3. How to make a Smart Rock-Paper-Scissors Game Robot
When finishing reading this tutorial, you will find those very simple devices, principles and technologies can help you build very interesting equipment.
Hardware list:
DFRduino Uno R3 x 1
Gravity IO expansion shield for Arduino x 1
Tower Pro MG90S servo x 3
Ultrasonic wave sensor x 1
DFRduino Uno V3.0 from DFRobot is a physical world computing board of small size for academics or development . It is a simple microcontroller board fully compatible with Arduino UNO R3 and Arduino IDE open-source development environment. This environment implements the Processing / Wiring language. Arduino can be used to develop stand-alone interactive objects or can be connected to software on your computer (e.g. Flash, Processing, MaxMSP). The open-source IDE can be downloaded for free (currently for Mac OS X, Windows, and Linux).
This board features the ATmega16U2 programmed as a USB-to-serial converter. An added bonus is that our DFRduino is still using the DIP package AVR Chip. You could remove it to update or reprogram the chip's firmware, or even to place it on a finished, more compact project. The cool thing about our new DFRduino microcontroller is that the headers use different colors to feature I/O ports of different types:
Red for Power Section.
Blue for Analog I/O.
Green for Digital I/O.
These colors match our sensor cables. This makes it really easy to figure out where to connect sensors, or to identify which side is Analog (blue) or Digital (green).
"Arduino Uno" is a microcontroller board based on the ATmega328. It has 14 digital input/output pins (of which 6 can be used as PWM outputs), 6 analog inputs, a 16 MHz crystal oscillator, a USB connection, a power jack, an ICSP header, and a reset button. It contains everything needed to support the microcontroller; simply connect it to a computer with a USB cable or power it with a AC-to-DC adapter or battery to get started.
This board added SDA and SCL pins that are near to the AREF pin and two other new pins placed near to the RESET pin, the IOREF that allow the shields to adapt to the voltage provided from the board. In future, shields will be compatible both with the board that use the AVR, which operate with 5V and with the "Arduino Due" that operate with 3.3V. The second one is a not connected pin, that is reserved for future purposes.
DFRduino UNO R3 Related Projects:
Spectrophotometer Experiment Based on AS7341 Spectral Sensor
DIY Temperature Gun Using Arduino and MLX90614 Module
How To a Make Bluetooth Tank for Arduino with Custom Android Application (V1.0)?
Arduino Project - Make an Arduino Intervalometer For Timelapse Photography
Existential Crisis aka Arduino RPG
How to Make A Terrifying Halloween Gadget?
How to Build a Robot ¨C Lesson 1: Introduction
How to Build a Robot Lesson 2: Build a Basic Robot with Arduino
How to Build a Robot Lesson 3: Build a Line Tracking Robot with Arduino
How to Build a Robot Lesson 4: Build a Robot That Could Avoid Obstacles with Arduino
How to Build a Robot Lesson 5: Build a Robot With Light And Sound Effects with Arduino
How to Build a Robot Lesson 6: Build a Robot That Could Monitor Environment with Arduino
How to Build a Robot Lesson 7: Build a Bluetooth-Controlled Robot with Arduino
ESP8266 Arduino Programming Tutorial
How to DIY an Indoor Carbon Dioxide Detector?
How to Build A Smart Cooling Fan with Arduino
DFRduino UNO R3 Project 1: How to Make A Terrifying Halloween Gadget
This is a simple but fun application for Halloween. All you need is a mask, a stepper motor, a micro-controller, a motor driver, a MP3 module and some wires as well as batteries.
Hardware components:
DFRduino UNO R3 - Arduino Compatible
TMC260 Stepper Motor Driver Shield For Arduino
Bipolar Stepper Motor with Planet Gear Box (18kg.cm)
DFPlayer - A Mini MP3 Player For Arduino
Gravity: Digital PIR (Motion) Sensor For Arduino
DFRduino UNO R3 Project 2. Test DFPlayer Mini MP3 Module by Stonez
This tutorial here is just to show you how to connect DFPlayer module with Arduino and speaker and the Arduino sketch provided here just to play few sample sounds I collected from Internet.
Hardware list:
DFPlayer Mini module
Speaker - DFPlayer module support to to 3W
SD card - 2GB ~ 32GB formatted with FAT or FAT32
MP3 / WAV - audio files
Arduino Uno Rev 3
Few jump wires
DFRduino UNO R3 Project 3. How to make a Smart Rock-Paper-Scissors Game Robot
When finishing reading this tutorial, you will find those very simple devices, principles and technologies can help you build very interesting equipment.
Hardware list:
DFRduino Uno R3 x 1
Gravity IO expansion shield for Arduino x 1
Tower Pro MG90S servo x 3
Ultrasonic wave sensor x 1
DFRduino UNO R3 Project 4 Arduino Projects: Zelda Song Player
Things you may need in this project: Hardware components
DFRobot DFRduino Uno R3
DFRobot Input Shield for Arduino
DFRobot Gravity: Digital Speaker Module
Arduino UNO & Genuino UNO
DFRduino UNO R3 Project 5 How To Make LED Kitchen Sink Lights with a PIR Sensor, Arduino, and 3D Printing
Specification
These colors match our sensor cables. This makes it really easy to figure out where to connect sensors, or to identify which side is Analog (blue) or Digital (green).
"Arduino Uno" is a microcontroller board based on the ATmega328. It has 14 digital input/output pins (of which 6 can be used as PWM outputs), 6 analog inputs, a 16 MHz crystal oscillator, a USB connection, a power jack, an ICSP header, and a reset button. It contains everything needed to support the microcontroller; simply connect it to a computer with a USB cable or power it with a AC-to-DC adapter or battery to get started.
This board added SDA and SCL pins that are near to the AREF pin and two other new pins placed near to the RESET pin, the IOREF that allow the shields to adapt to the voltage provided from the board. In future, shields will be compatible both with the board that use the AVR, which operate with 5V and with the "Arduino Due" that operate with 3.3V. The second one is a not connected pin, that is reserved for future purposes.Shipping List
This is a simple but fun application for Halloween. All you need is a mask, a stepper motor, a micro-controller, a motor driver, a MP3 module and some wires as well as batteries.
Hardware components:
DFRduino UNO R3 - Arduino Compatible
TMC260 Stepper Motor Driver Shield For Arduino
Bipolar Stepper Motor with Planet Gear Box (18kg.cm)
DFPlayer - A Mini MP3 Player For Arduino
Gravity: Digital PIR (Motion) Sensor For Arduino
DFRduino UNO R3 Project 2. Test DFPlayer Mini MP3 Module by Stonez
This tutorial here is just to show you how to connect DFPlayer module with Arduino and speaker and the Arduino sketch provided here just to play few sample sounds I collected from Internet.
Hardware list:
DFPlayer Mini module
Speaker - DFPlayer module support to to 3W
SD card - 2GB ~ 32GB formatted with FAT or FAT32
MP3 / WAV - audio files
Arduino Uno Rev 3
Few jump wires
DFRduino UNO R3 Project 3. How to make a Smart Rock-Paper-Scissors Game Robot
When finishing reading this tutorial, you will find those very simple devices, principles and technologies can help you build very interesting equipment.
Hardware list:
DFRduino Uno R3 x 1
Gravity IO expansion shield for Arduino x 1
Tower Pro MG90S servo x 3
Ultrasonic wave sensor x 1
RETURNS POLICY
Lorem ipsum dolor sit amet, consectetur adipiscing elit. Morbi ut blandit risus. Donec mollis nec tellus et rutrum. Orci varius natoque penatibus et magnis dis parturient montes, nascetur ridiculus mus. Ut consequat quam a purus faucibus scelerisque. Mauris ac dui ante. Pellentesque congue porttitor tempus. Donec sodales dapibus urna sed dictum. Duis congue posuere libero, a aliquam est porta quis.
Donec ullamcorper magna enim, vitae fermentum turpis elementum quis. Interdum et malesuada fames ac ante ipsum primis in faucibus.
Curabitur vel sem mi. Proin in lobortis ipsum. Aliquam rutrum tempor ex ac rutrum. Maecenas nunc nulla, placerat at eleifend in, viverra etos sem. Nam sagittis lacus metus, dignissim blandit magna euismod eget. Suspendisse a nisl lacus. Phasellus eget augue tincidunt, sollicitudin lectus sed, convallis desto. Pellentesque vitae dui lacinia, venenatis erat sit amet, fringilla felis. Nullam maximus nisi nec mi facilisis.
SHIPPING
Lorem ipsum dolor sit amet, consectetur adipiscing elit. Morbi ut blandit risus. Donec mollis nec tellus et rutrum. Orci varius natoque penatibus et magnis dis parturient montes, nascetur ridiculus mus. Ut consequat quam a purus faucibus scelerisque. Mauris ac dui ante. Pellentesque congue porttitor tempus. Donec sodales dapibus urna sed dictum. Duis congue posuere libero, a aliquam est porta quis.
Donec ullamcorper magna enim, vitae fermentum turpis elementum quis. Interdum et malesuada fames ac ante ipsum primis in faucibus.
Curabitur vel sem mi. Proin in lobortis ipsum. Aliquam rutrum tempor ex ac rutrum. Maecenas nunc nulla, placerat at eleifend in, viverra etos sem. Nam sagittis lacus metus, dignissim blandit magna euismod eget. Suspendisse a nisl lacus. Phasellus eget augue tincidunt, sollicitudin lectus sed, convallis desto. Pellentesque vitae dui lacinia, venenatis erat sit amet, fringilla felis. Nullam maximus nisi nec mi facilisis.